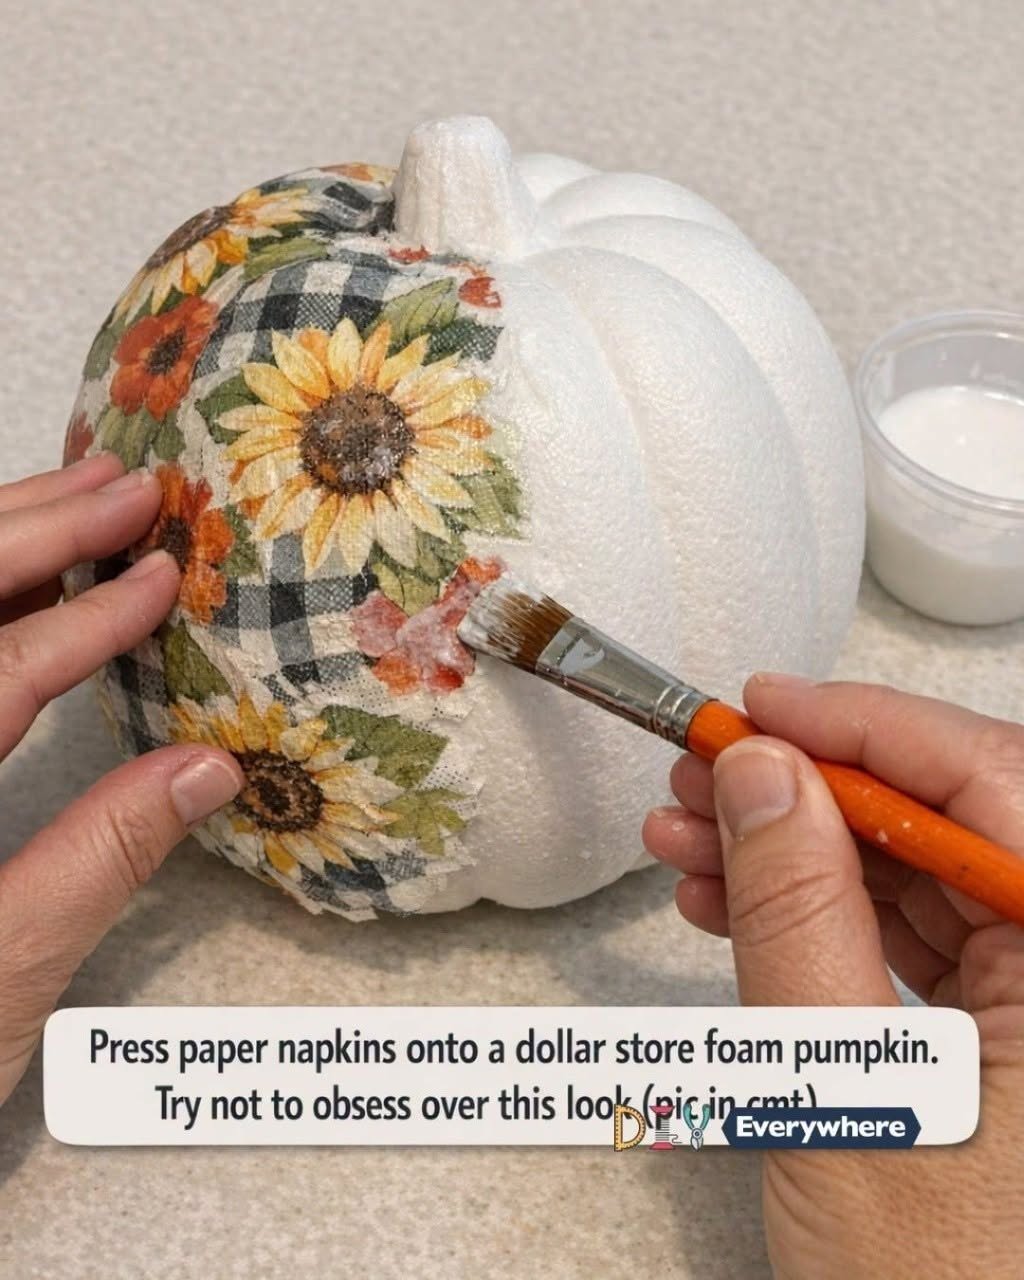
cutting skills, complicated tools, or an entire afternoon dedicated to crafting. The slightly imperfect texture is actually part of the charm.
Why You’ll Love This Pumpkin Project
This is an easy seasonal craft that can be customized to match almost any decorating style.
Choose vintage florals for a romantic farmhouse look, tiny leaves for a natural autumn display, or plaid and toile patterns for something more traditional.
Because the pumpkins are covered with small pieces of napkin, you don’t have to worry about making every piece perfectly shaped. The curves
and grooves of the pumpkin naturally create a soft, layered appearance.
Materials You’ll Need
-
- 2 dollar-store foam pumpkins, approximately 5–7 inches wide each
- 1 pack of printed paper napkins, preferably with a small-scale floral or vintage-style pattern
- ½ cup decoupage glue
- 2 tablespoons white acrylic paint
- 1 soft brush, approximately 1–1½ inches wide
- 1 small detail brush, or the tip of the soft brush for tight areas
- 1 pair of scissors
- 1 small cup or bowl for the glue
- 1 sheet of wax paper or parchment paper to protect your
- work surface
- 2–4 tablespoons clear matte sealer or additional decoupage glue for the topcoat
How to Make the Decoupage Foam Pumpkins
1. Protect Your Work Surface
Cover your work surface with wax paper or parchment paper.
Place the pumpkins, glue, paintbrushes, and napkins nearby so everything is within easy reach while you work.
2. Paint the Base
Apply a thin, even coat of white acrylic paint to each foam pumpkin.
Pay particular attention to the grooves, curves, and areas around the stem.
Allow the paint to dry completely before moving
on to the napkin layer. A white base helps the printed design stand out and gives the finished pumpkins a softer, more finished appearance.
3. Separate the Napkin Layers
Most decorative paper napkins are made from several thin layers.
Carefully separate the printed top layer from the plain backing layers. You want to work only with the thin decorative layer containing the pattern.
Handle it gently because the paper becomes even more delicate once glue is applied.
4. Cut or Tear the Napkins
Cut or tear the napkins into pieces
approximately 1–3 inches wide.
Keep a mixture of larger floral sections and smaller pieces. Larger pieces can cover the broader areas of the pumpkin, while smaller pieces are easier to fit into the grooves and around curved sections.
5. Apply the Decoupage Glue
Brush a light coat of decoupage glue onto a small section of the first pumpkin, roughly the size of your palm.
Working in small areas gives you more control and reduces the chance of the thin napkin becoming overly saturated with glue.
6. Press on the Napkin
Place one piece of decorative napkin onto the glued section.
Gently press it into place with your fingers, then use a slightly damp brush to smooth the paper from the center toward the edges.
Work gently rather than scrubbing the surface, because the thin paper can tear easily.
The trick is not to chase perfection—the little overlaps, gentle wrinkles, and variations are what give these pumpkins their charming handmade character.
7. Continue Around the Pumpkin
Add additional napkin pieces, slightly overlapping the edges of the previous pieces.
Continue working around
the pumpkin in small sections until the surface is covered.
Don’t worry if every piece doesn’t sit perfectly flat. Once the entire pumpkin is covered and sealed, the subtle texture can become part of the finished design.
8. Work Into the Grooves
Use smaller torn pieces to cover the deeper grooves and the curved areas near the top and bottom of the pumpkin.
Press the paper gently into the contours with your fingers or a soft brush.
Adding smaller pieces in these areas helps the pattern look more continuous rather
than leaving obvious uncovered patches.
9. Decorate the Second Pumpkin
Repeat the same process on the second pumpkin.
For a more natural-looking pair, don’t arrange the flowers or decorative elements in exactly the same positions. Allow each pumpkin to have its own pattern while keeping the overall colors and style coordinated.
10. Let the Pumpkins Dry
Allow both pumpkins to dry for at least 30–45 minutes.
Once they have dried, inspect the surface for any lifted edges. If you find one, apply a small amount of additional decoupage glue underneath
it and gently press it back into place.
11. Add the Protective Topcoat
Brush a thin finishing layer of decoupage glue or clear matte sealer over the entire pumpkin.
This helps protect the napkin design while softening the appearance of the individual paper edges.
Try not to apply an excessively thick layer, especially over delicate areas.
12. Allow the Finish to Dry Completely
Leave the pumpkins undisturbed until the final coat has completely dried.
If you want a more finished and protected surface, apply a second thin topcoat after the
first one has dried.
Variations and Decorating Tips
For a Softer Vintage Look
Choose napkins featuring faded roses, delicate vines, small botanical prints, or cream-colored backgrounds.
These muted designs work beautifully with the white-painted base and create a vintage-inspired appearance.
If You Don’t Like Wrinkles
Use smaller torn pieces instead of large sections of napkin.
Small pieces are easier to position around the pumpkin’s grooves and curves and tend to settle more naturally onto the surface.
For a Non-Floral Version
Not everyone loves floral decorations, and that’s perfectly fine.
Try
